3rd party integration
You can use GeoPoDe’s data directly from your favorite GIS tool by using the WMS or the WFS standards.
Important
While this will require basic authentication using your username, you won’t use your password but instead a temporary token. See below for instructions.
Getting parameters
You can get parameters needed to configure an external GIS tool directly from GeoPoDe. To do so, open the ‘3rd party integration’ dialog from the main menu.
Important
You need to be logged in to access this feature.
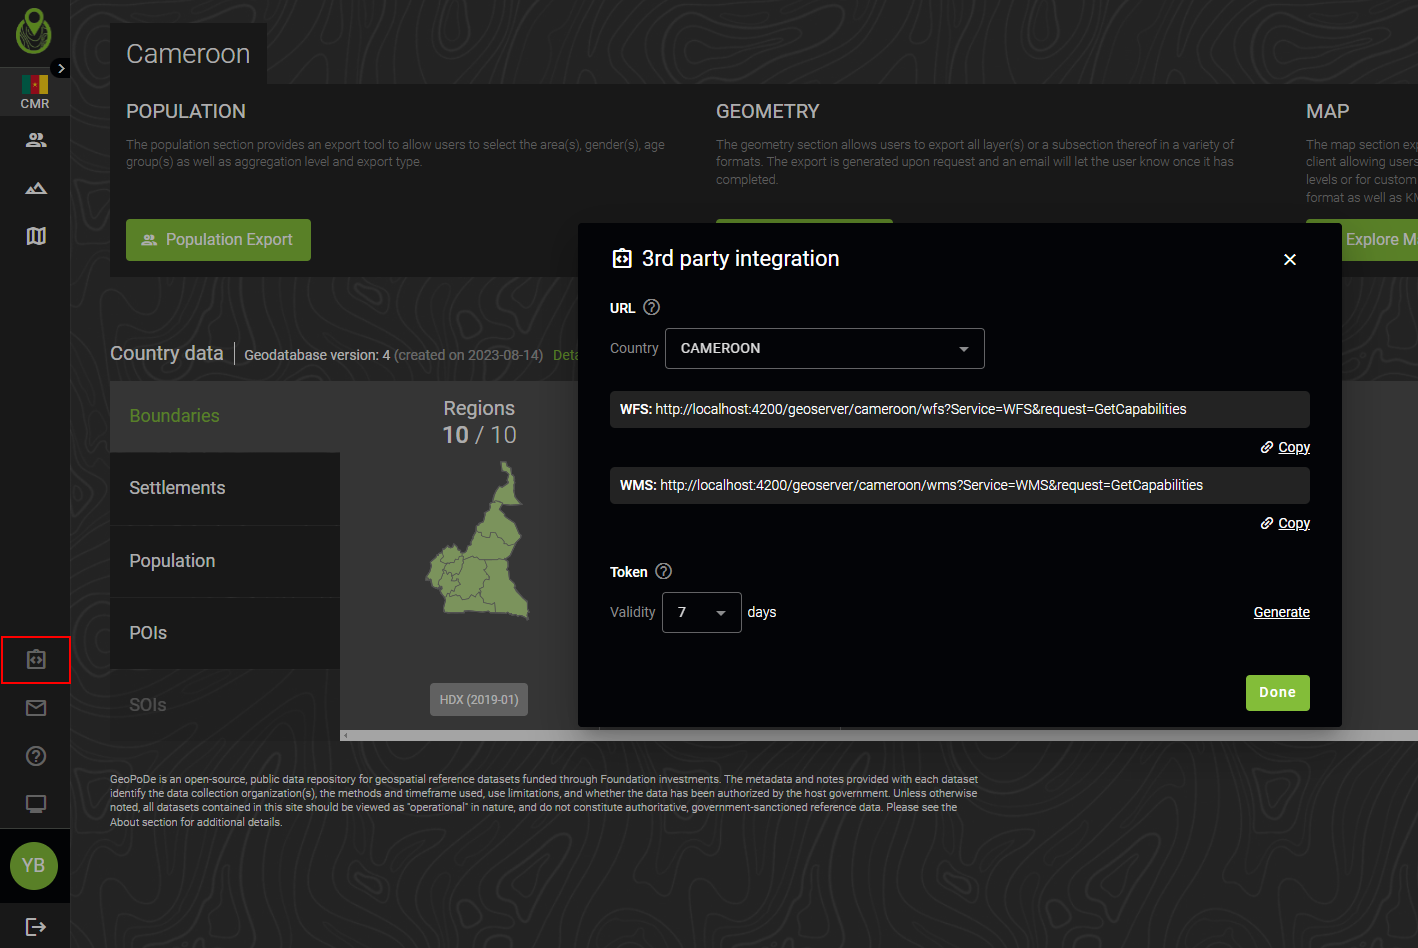
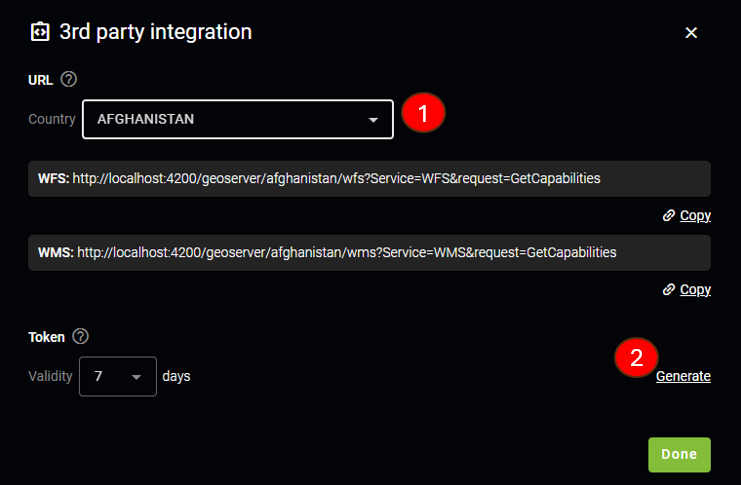
Using the modal you can generate the parameters you will need to configure an external tool:
Select a country to generate the WMS and WFS endpoint URLs for this specific country
Generate a token with the selected validity (validity defines the number of days before the token expires) that will be used to authorize access to the data.
Note
The same token can be used for several countries.
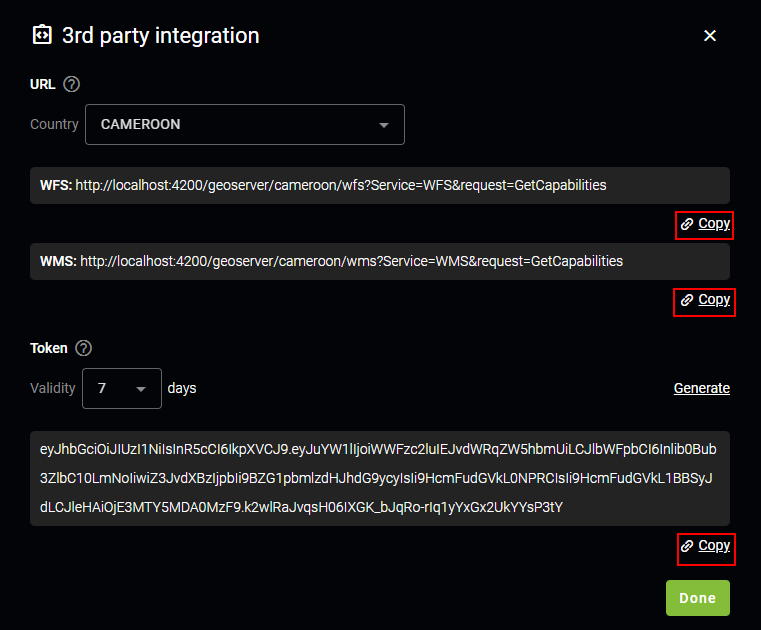
Use the ‘Copy’ buttons to copy the parameters to the clipboard and then paste them into your external tool of choice.
Integrate with QGIS
You can process GeoPoDe’s data directly from QGIS. To do so, you have the option to use WFS or WMS protocols. Both are configured the same way.
First, create a new connection from the browser panel for the protocol you want to use (WMS / WMTS if you want to use WMS, or WFS / OGC API - Features for WFS):
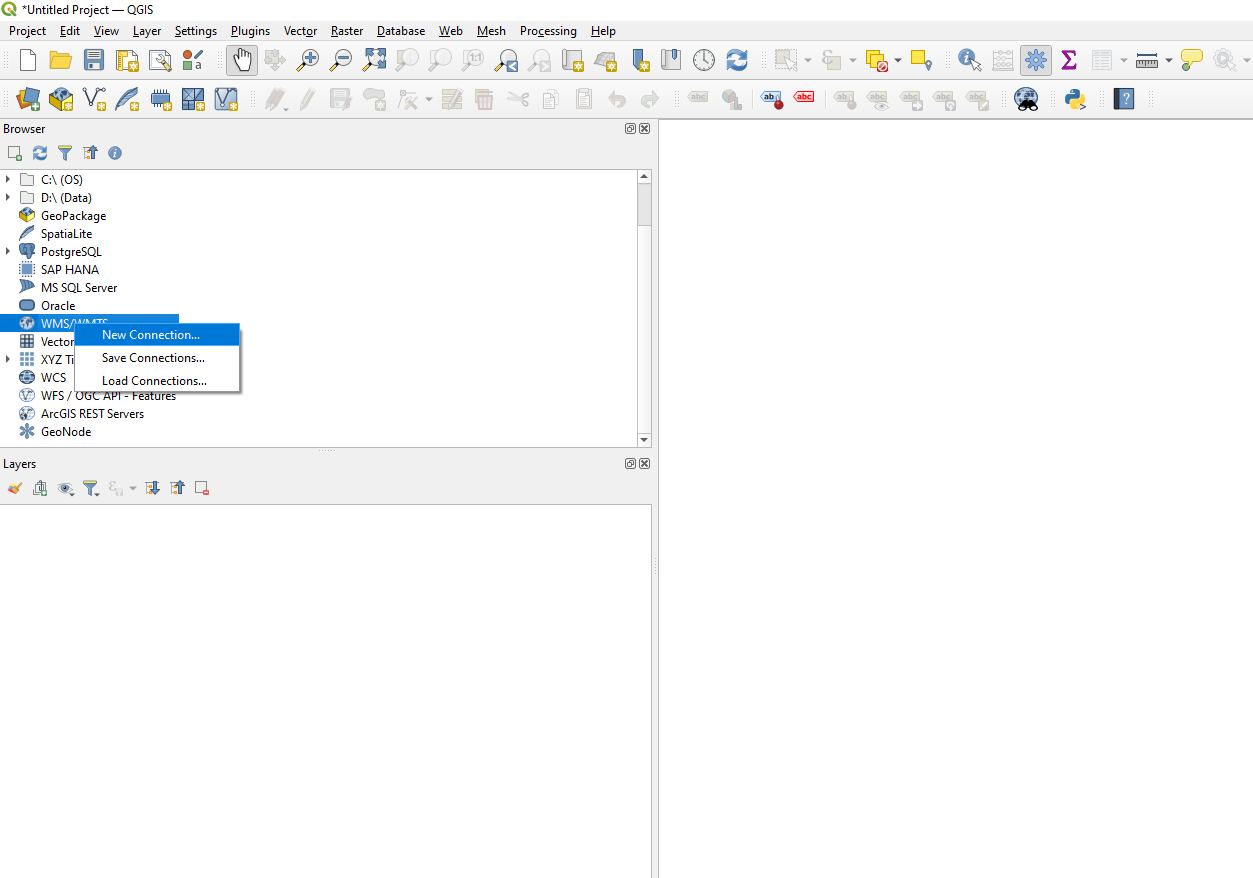
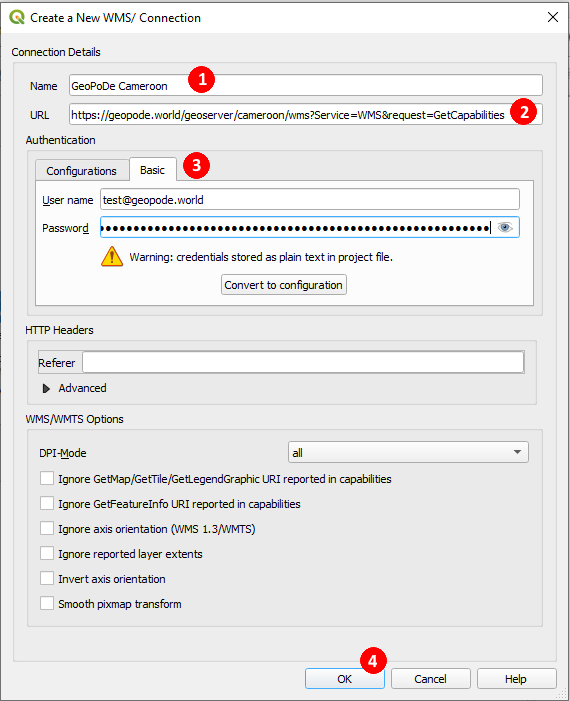
In the connection modal, fill the following information:
Name: enter a meaningful name for your connection (this is the name that will be used by QGIS to display the connection in the browser panel)
URL: copy the WMS (or WFS) URL you get from the 3rd party integration modal in GeoPoDe
In the ‘Authentication’ section, select the ‘Basic’ tab and type your GeoPoDe user name in the ‘User name’ field and copy the token you get from the 3rd party integration modal in GeoPoDe into the ‘password’ field
Click OK to create the connection
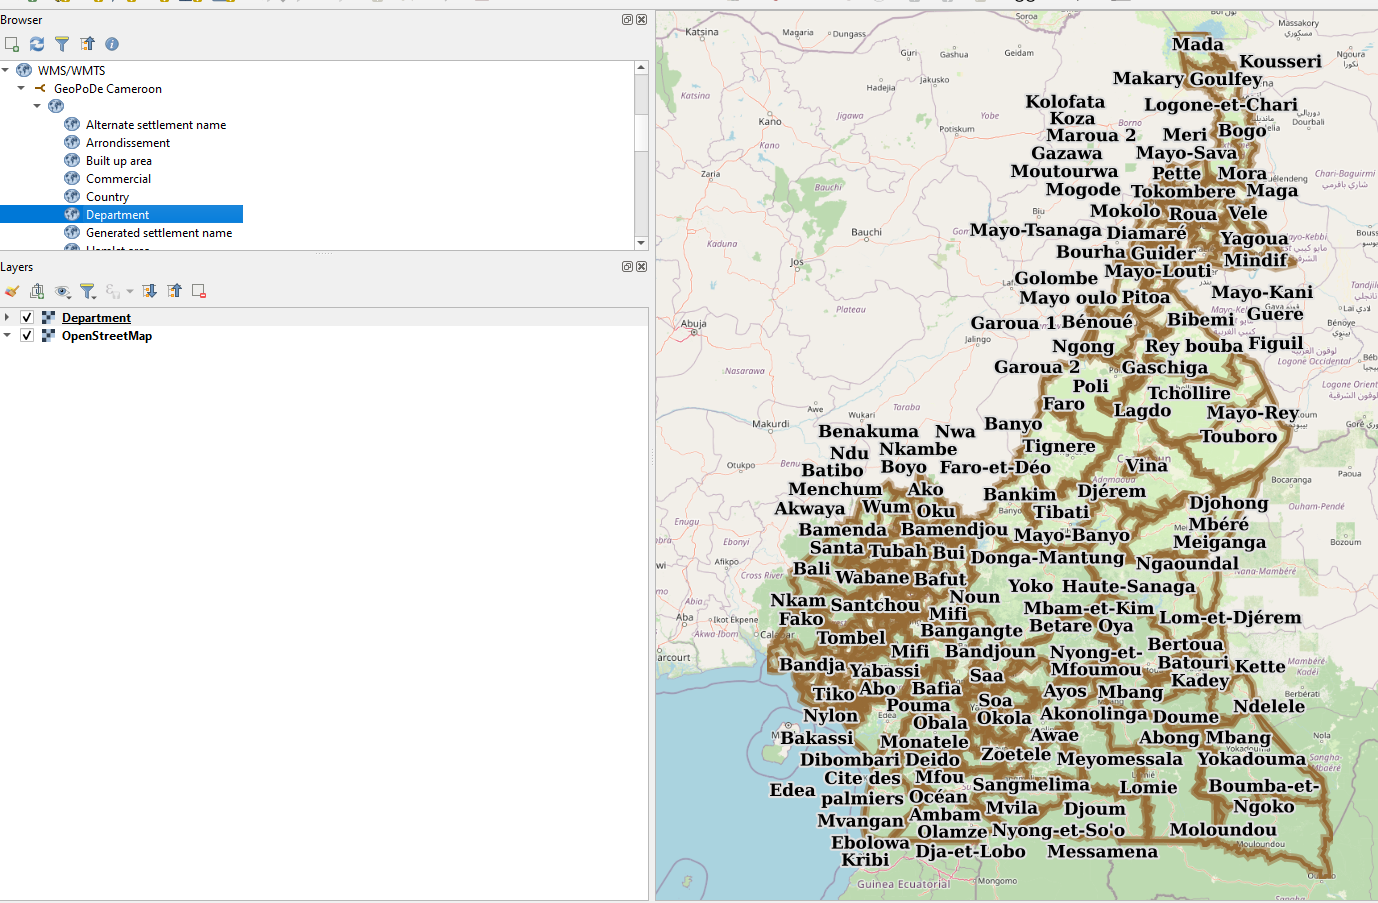
The new connection should appear in the browser panel and you should now be able to add GeoPoDe’s layers to your QGIS project.
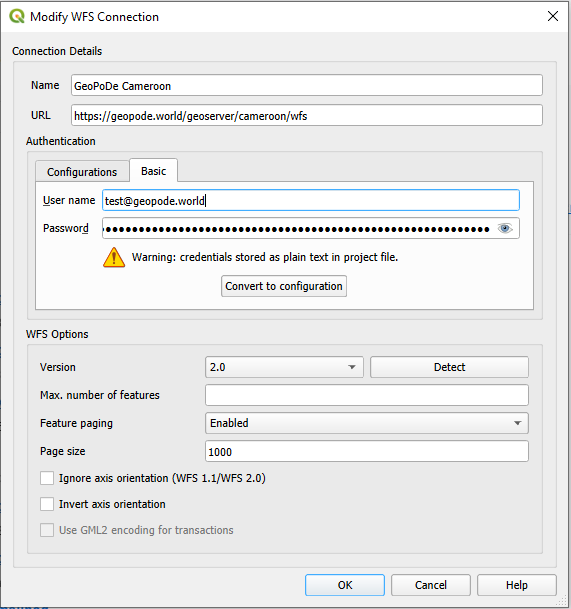
WFS paging
If you use WFS, you should enable paging, otherwise some layers with a large number of features may not load. To do this, please select WFS version 2, enable paging, and choose a reasonable page size (e.g., 1000) on the connection settings.
Integrate with ArcGIS
You can also integrate GeoPoDe with ArcGIS Pro or ArcMap. Like QGIS you have the option to use the WMS or the WFS protocol.
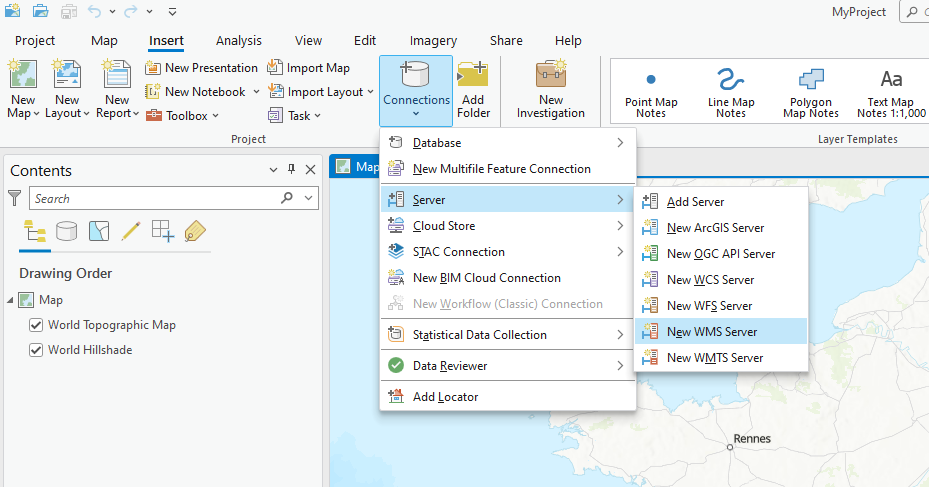
First you need to create a connection. To do so, select the ‘Insert’ tab and then from the sub-menu select ‘Connections > Server > New WMS (or WFS) Server’.
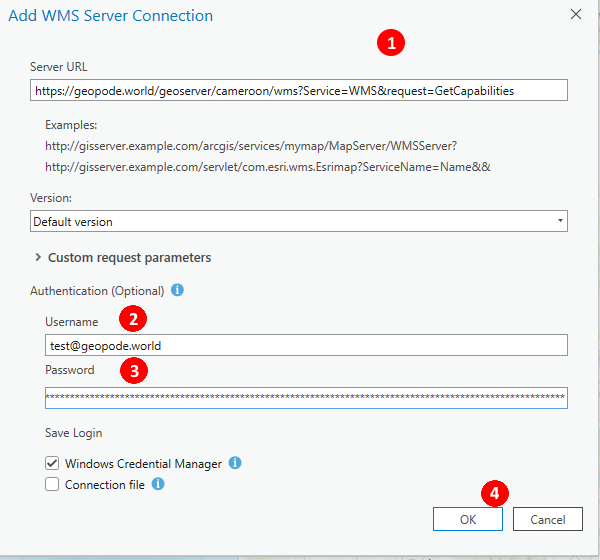
Then fill the connection form as follows:
Server URL: copy the WMS (or WFS) URL from the 3rd party integration modal in GeoPoDe
Username: type your GeoPoDe user name
Password: copy the token from the 3rd party integration modal in GeoPoDe
Click OK to create the connection
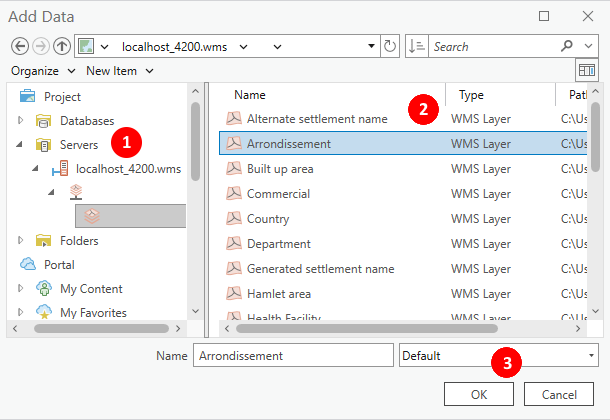
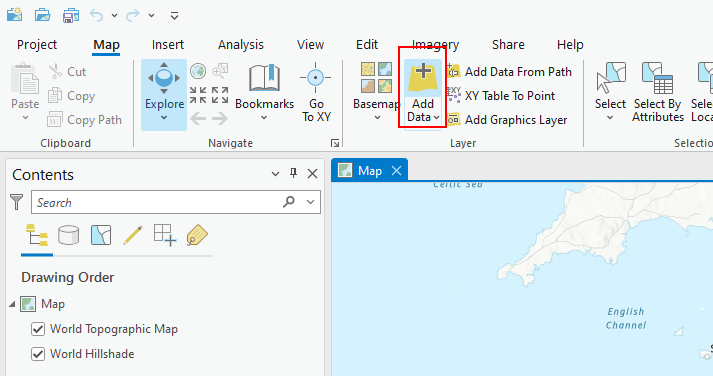
You can now add GeoPoDe’s layers into your map. To do so, first click on the ‘Add Data’ menu from the ‘Map’ tab.
From the add data modal:
Select the server you created from the ‘Project > Servers’ list
Browse it to find the layer you want to add
Click OK button
